Well, I 'opened' the axle some time ago. Guess what. It's beyond repair aswell. I'm gettin' tired with these axles already :) At the moment I can't go forward because of lack of parts. If you read this and have GOOD axle laying around for sale, let me know.
Drove 1000km christmas trip with S2. I was little worried how it copes in the extreme weather conditions (minus 32 degC at worst), but all went well. I had put a piece of cardboard in front of the radiator to minimize the airflow cooling effect during winter.
torstai 30. joulukuuta 2010
sunnuntai 12. joulukuuta 2010

sunnuntai 28. marraskuuta 2010
Update...
Long time, no update. The old axle is removed from the car and disposed. Looked for a replacement axle and ended up buying a whole spare car, a 1.4 106 XSI. Technically sweet running thing, drove it 100km from the selling location. I love short stroke TU-engines.
Holidays in the sun interrupted a bit and the unusually cold wether (it's -15 now, that's more than 10 degrees less than normal for this time of year) makes fiddling with the spare car outside not so tempting. It was nice to enjoy week in +27degC and swin in +23degC seawater. All inc. Did not gain any weight however, due to active holiday.
Anyway something has been done, I changed the side mirrors (to s1) which were painted to body color and paint had started peeling off making them look ugly. Removed some parts from the interior (xsi), some for my use, other for sale. Wheels were also sold. Front seats reused in S2. Improved the lighting in the garage by adding extra 150cm length fluorescent lamps ('loisteputki' in finnish) to the sealing. One just on top of a engine bay, other just above the working table. The lighting is now as good as it gets.
perjantai 5. marraskuuta 2010
Removing the broken axle
As I prepared for removing the broken axle, I measured the torsion bars and antiroll bar. Torsion bars were 18mm (original 19mm diameter, same in XSI>I). ARB was 18mm (original 21mm).
On a positive side, seems that no brake pipe work is needed. The brake pipe connectors opened just fine. And there is no load sensitive brake pressure adjuster neither.
On a positive side, seems that no brake pipe work is needed. The brake pipe connectors opened just fine. And there is no load sensitive brake pressure adjuster neither.
torstai 4. marraskuuta 2010
Situation normal, all fucked up
This rear axle is FUBAR. I'm gutted. Have to find a spare center tube. Why an earth did I sell my spare tube few months ago !?
tiistai 2. marraskuuta 2010
S1 Rallye work continue...
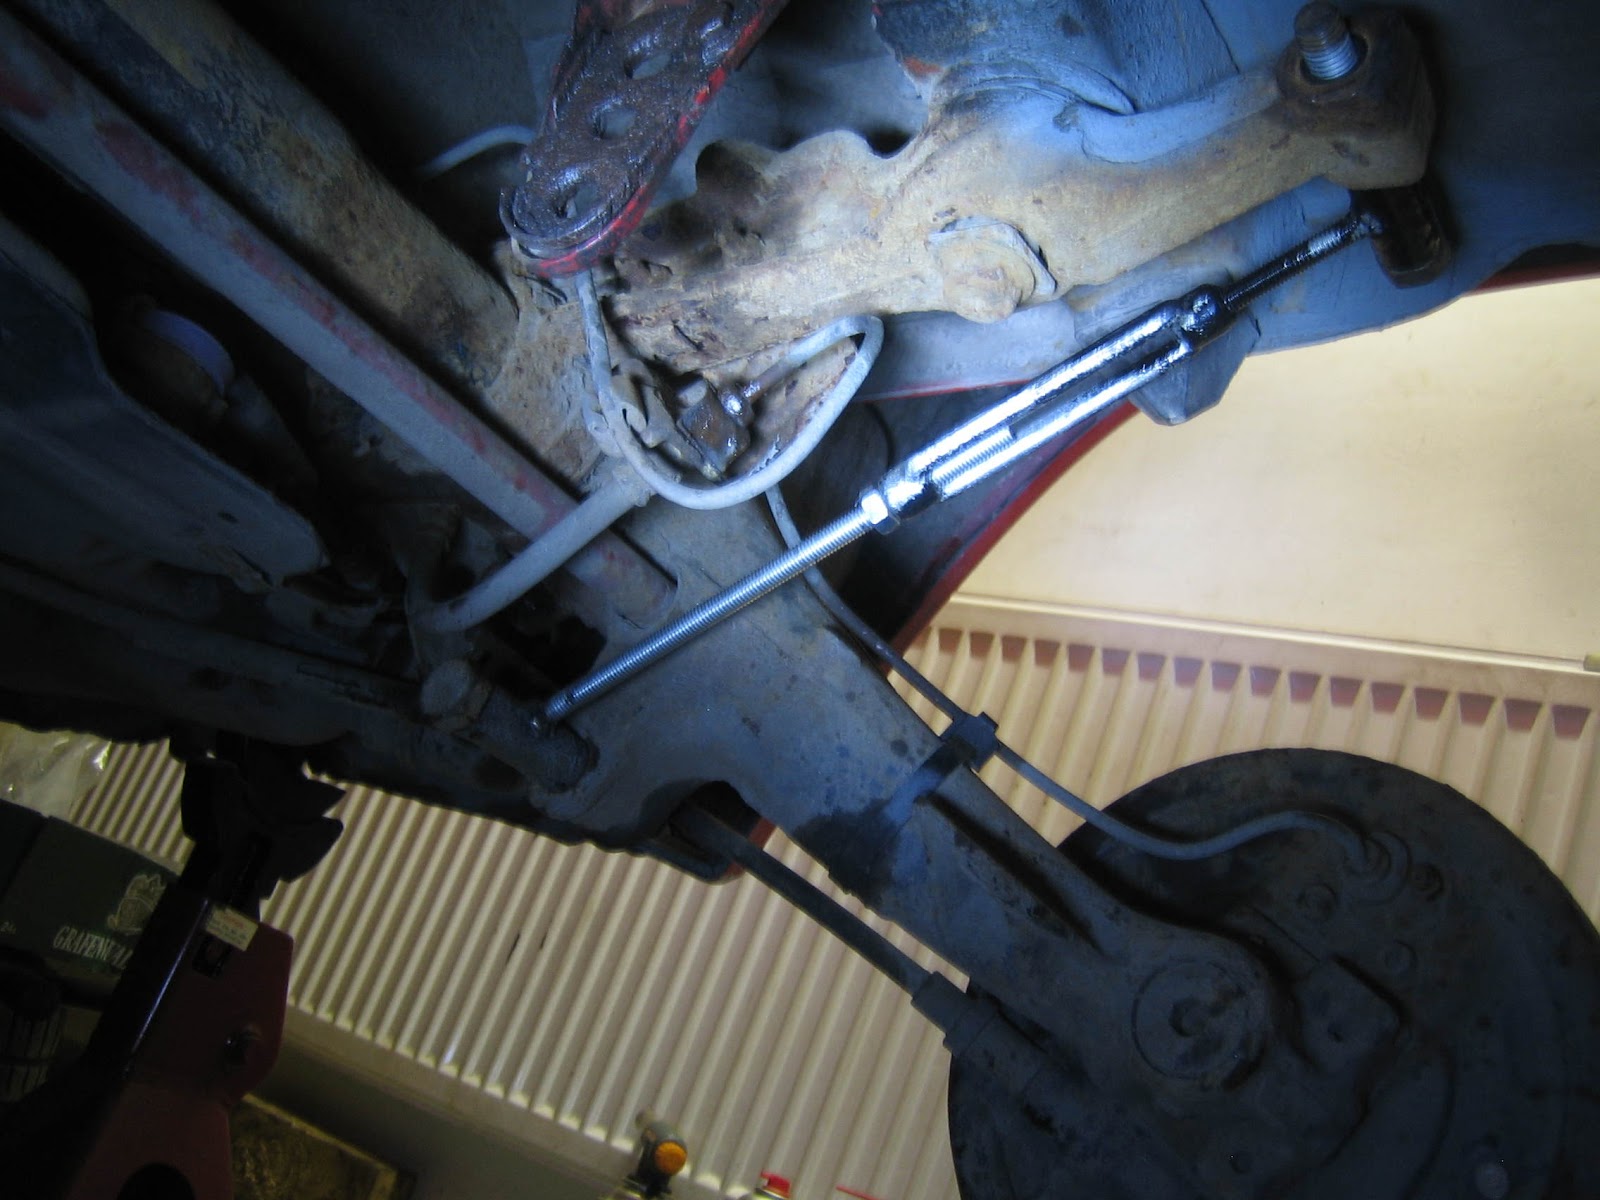
After what felt like a million small tasks (fitting door panels, blocking roll cage bolt holes etc) the S1 finally felt like ready for MOT. It was sunday however and I thought that I could do one more thing: put grease nipples to the rear axle. I drilled the right hand side first... When the drill went though the wall of the trailing arm - rust! I was completely surprised and must say - felt like an idiot! I had thought that the arm was ok condition. Time for a rethink.
After a brief thinking session, I was convinced I'd have to take the arms apart to see the condition of the bearings properly. The arb endplate was quickly removed from the drivers side with a help of 12mm (1.5mm thread) bolt.

To get left hand trailing arm first, one must hammer from the right hand side:

In that picture I have already taken the T40 torx screw and offset washer out from the end of torsion bar. The washer was a bit tricky to remove because the lack of space. Also the support for the brake pipe was released to gain space for hammering.
Before hammering, I marked the position of the t.bars with two methods (one would have been enough):


It helps if one lifts the trailing arm from the drum to release torsion from the bar. Couple of hits (with homemade tool) and the bar is loose

View from the drivers side - the stub pin is in very good condition:

A bit of archeology is needed :) Looks bad but in reality not so difficult, a bit of WD40 will do wonders

ARB should be removed (or just loosened) before hitting the other t.bar, otherwise it adds unnecessary friction. It is after all quite tight fit to the stub pin.
to be continued...
After a brief thinking session, I was convinced I'd have to take the arms apart to see the condition of the bearings properly. The arb endplate was quickly removed from the drivers side with a help of 12mm (1.5mm thread) bolt.

To get left hand trailing arm first, one must hammer from the right hand side:

In that picture I have already taken the T40 torx screw and offset washer out from the end of torsion bar. The washer was a bit tricky to remove because the lack of space. Also the support for the brake pipe was released to gain space for hammering.
Before hammering, I marked the position of the t.bars with two methods (one would have been enough):

It helps if one lifts the trailing arm from the drum to release torsion from the bar. Couple of hits (with homemade tool) and the bar is loose
.jpg)

View from the drivers side - the stub pin is in very good condition:

A bit of archeology is needed :) Looks bad but in reality not so difficult, a bit of WD40 will do wonders

ARB should be removed (or just loosened) before hitting the other t.bar, otherwise it adds unnecessary friction. It is after all quite tight fit to the stub pin.
to be continued...
maanantai 11. lokakuuta 2010
S1 Rallye
This my another rallye, cherry red S1. I bought it without much thinking when it came on sale last spring for a good prize. What an intense little beast it is with it's high strung 1.3 engine and close ratio box! I drove it few weeks and put it in garage after the blue car was ready for the summer. It came with bolt-on OMP roll-cage. After some driving I decided get rid of the cage. After all, it wasn't a proper racing cage, but more for show.
.jpg)
The current plan is to drive this car next winter, or sell it - difficult to say. I tend to be volatile sometimes. At the moment I treat it as if it was a "keeper". So it will receive some tender loving care, first in a form of new dampers and springs (one of the dampers was totally dead).
This is the position of the strut in non-PAS car (left hand side):

Right hand side:

Cleaned the strut a bit
.jpg)
and painted with Hammerite

The H&R spring is actually ment for 106GTI but at least the drive height seems just right even for this light car. The ride height is now 15mm higher than with the lowering springs that came with the car. Can't wait to drive this setup (still some work to do before). A bit more understeer maybe? I'm gonna put a 24mm ARB for the rear axle so a little bit of understeer at this point is not a problem.
Update: the right hand side was more work: wheel bearing had to be changed (only in finnish!) and some previous owner had assembled the metal strip that hold the break pads in a wrong way, resulting the metal strip to tear apart and the pads almost flying away. New break pad assembly kit had to be bought:

First I thought I could get a spare part from a spare 106GTI struts which I happen to have lying around, but not. The S1 rallye has BENDIX breaks, S2 has ATE and they are fundamentally different. The ATE ones are much more big and robust, no metal strips holding pads in place.
.jpg)
The current plan is to drive this car next winter, or sell it - difficult to say. I tend to be volatile sometimes. At the moment I treat it as if it was a "keeper". So it will receive some tender loving care, first in a form of new dampers and springs (one of the dampers was totally dead).
This is the position of the strut in non-PAS car (left hand side):

Right hand side:

Cleaned the strut a bit
.jpg)
and painted with Hammerite

The H&R spring is actually ment for 106GTI but at least the drive height seems just right even for this light car. The ride height is now 15mm higher than with the lowering springs that came with the car. Can't wait to drive this setup (still some work to do before). A bit more understeer maybe? I'm gonna put a 24mm ARB for the rear axle so a little bit of understeer at this point is not a problem.
Update: the right hand side was more work: wheel bearing had to be changed (only in finnish!) and some previous owner had assembled the metal strip that hold the break pads in a wrong way, resulting the metal strip to tear apart and the pads almost flying away. New break pad assembly kit had to be bought:

First I thought I could get a spare part from a spare 106GTI struts which I happen to have lying around, but not. The S1 rallye has BENDIX breaks, S2 has ATE and they are fundamentally different. The ATE ones are much more big and robust, no metal strips holding pads in place.
Tilaa:
Blogitekstit (Atom)